My Corner Online

SET ONE
Lesson 10 - What are messies, making extractions, and Bows!
We have already learned what jaggies are, which are the jagged edges when you look at something at 100% on your screen. Now, you will learn what messies are and how to make an extraction.
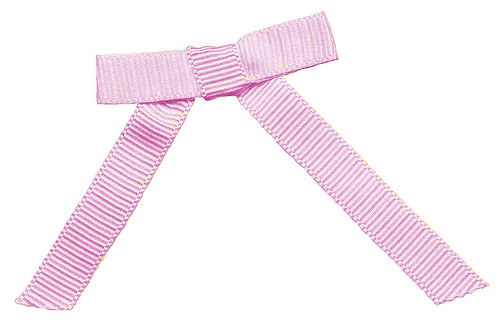
You will be creating a real bow, scanning it in at 300ppi (or higher) and extracting the image to share. You will learn how to color the bow. An alternative is to use a camera, but it is suggested to only use the highest quality of cameras (usually SLR's). Sometimes images that are further from the scanner can become blurred and a camera may be the better choice. However, you can utilize whatever you have to complete the lesson, even if it is not the highest quality. Just know that for selling designs, you would need either a scanner or a really expensive camera.
First learn how to make an extraction
Extractions are not only utilized in making elements from photos or scans, but also for some layout techniques, such as OOBS. Please ask questions here.
Learn what "messies" are in this video and how to clean them up.
Use either a red stroke or a bevel to find them.
For this lesson, tie a bow, scan it at 300 ppi, extract it, and color it.
You may do just one or more than one.
Here's another video with the new tool in PSE 11 which is also in Photoshop. It is hard for me to keep up with new videos on all the new technology, but you can learn skills from all the versions of videos.
Then, learn how to color the extraction
Then continue with coloring the bow in this video.
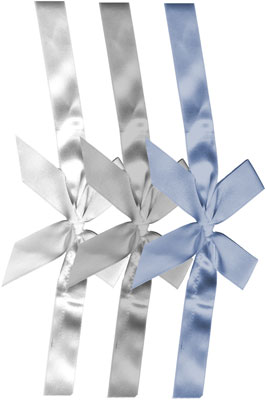
My challenge for you is to extract a bow and recolor it, then share the bow with us in this thread!
Here is your digital bows!